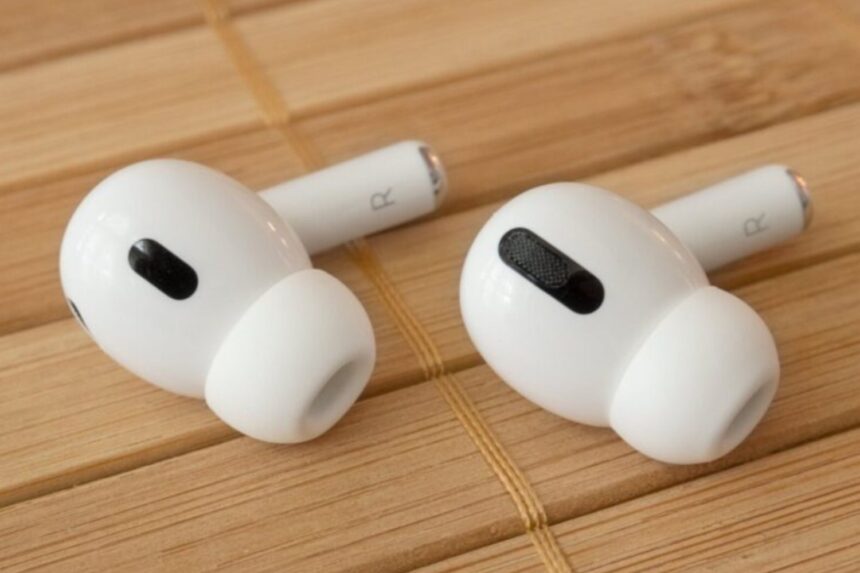
While the latest AirPods 4 unveiled at Apple’s Glowtime event didn’t really impress us, another audio-related announcement did: the AirPods Pros’ hearing health update. Apple announced at its latest event that its two-year-old AirPods Pro 2 are getting three hearing health features.
First, they can double as hearing aids for folks with mild to moderate hearing loss. Second, they now feature a loud sound reduction feature, which, as the name suggests, turns exceptionally loud and harsh noise (at a concert, for example) a notch down so your ears don’t undergo damage. Third, you can take a hearing test on your iPhone and add its results to the iOS Health app. The test will inform you about the state of your hearing and automatically enable the hearing aids to feature if you think you need them.
Pre-requisites for the AirPods Pro 2’s Hearing Health Features
To access the hearing health features on the AirPods Pro 2, you’d need to be on the latest iOS version, iOS 18.1. This shouldn’t be an issue unless you’re using an iPhone released before the iPhone XR. Every iPhone released after the iPhone XR and the iPhone SE 2nd and 3rd generation are compatible with iOS 18.1.
The AirPods Pro 2 you bought two years ago are good to run the new hearing health features. Apple didn’t make any product changes; it simply gave the 2022 AirPods Pro 2 the functionality in a firmware update. Firmware updates are automatic, so there’s not much you need to do there. This is both a good and a bad thing. It’s good because it doesn’t require any effort from your end, and it’s bad because if it doesn’t work, you can’t force an update.
Troubleshooting Tips
Apple promised that the firmware update would happen automatically, as it always does, and that we would need to do nothing. But here are a few troubleshooting tips that could help. First, make sure you’re on iOS 18.1. You can do this in Settings > General > About > iOS Version. If you see an older version, head to Settings > General > Software Update to update it.
The latest AirPods firmware update that facilitates all the hearing health features is 7B19. To check if you’re on this version, head to Settings > your AirPods option at the top > scroll down until you see Firmware and check the number afterward. If you see the buds didn’t update automatically, connect them to a charger while connected to your Wi-Fi. That should help update the firmware.
If that doesn’t work, hard resetting your AirPods is another option. To do this, dock both in the case, wait for 30 seconds, and flip the lid open. Then, press and hold the pairing button at the back of the case for 15 seconds until you see the tiny LED light in front of the case flash amber and then turn white. The reboot is done as soon as the light turns white.
Sometimes, your version is set to the latest one, but there are other small updates that need approval. It took me a while to access the hearing health features because both my iOS and firmware were up to date, but there were a few pending updates that I had to manually confirm. Make sure you’ve thoroughly checked out the Software Update page; there’s no work required there.
How to Take the Hearing Test
If you’ve successfully readied your phone and AirPods for the hearing test, you should see the features in Settings > AirPods Pro > right under the toggle options for noise control modes. Tap on “Take a Hearing test” and follow the instructions. The test should take about 10 minutes to complete, and you have to be in a quiet environment throughout the test. Make sure you follow this rule because around eight minutes into my test, I had to start all over since it detected the sound of the cereal packet on my breakfast tray. When I tried taking the test again on another day, the preschoolers in the playground right next to my house were loud enough to bother the Test Gods again. So, I shifted to my bed for a while and covered myself with a large blanket for the entirety of the test to drown out the sound of those darn kids.
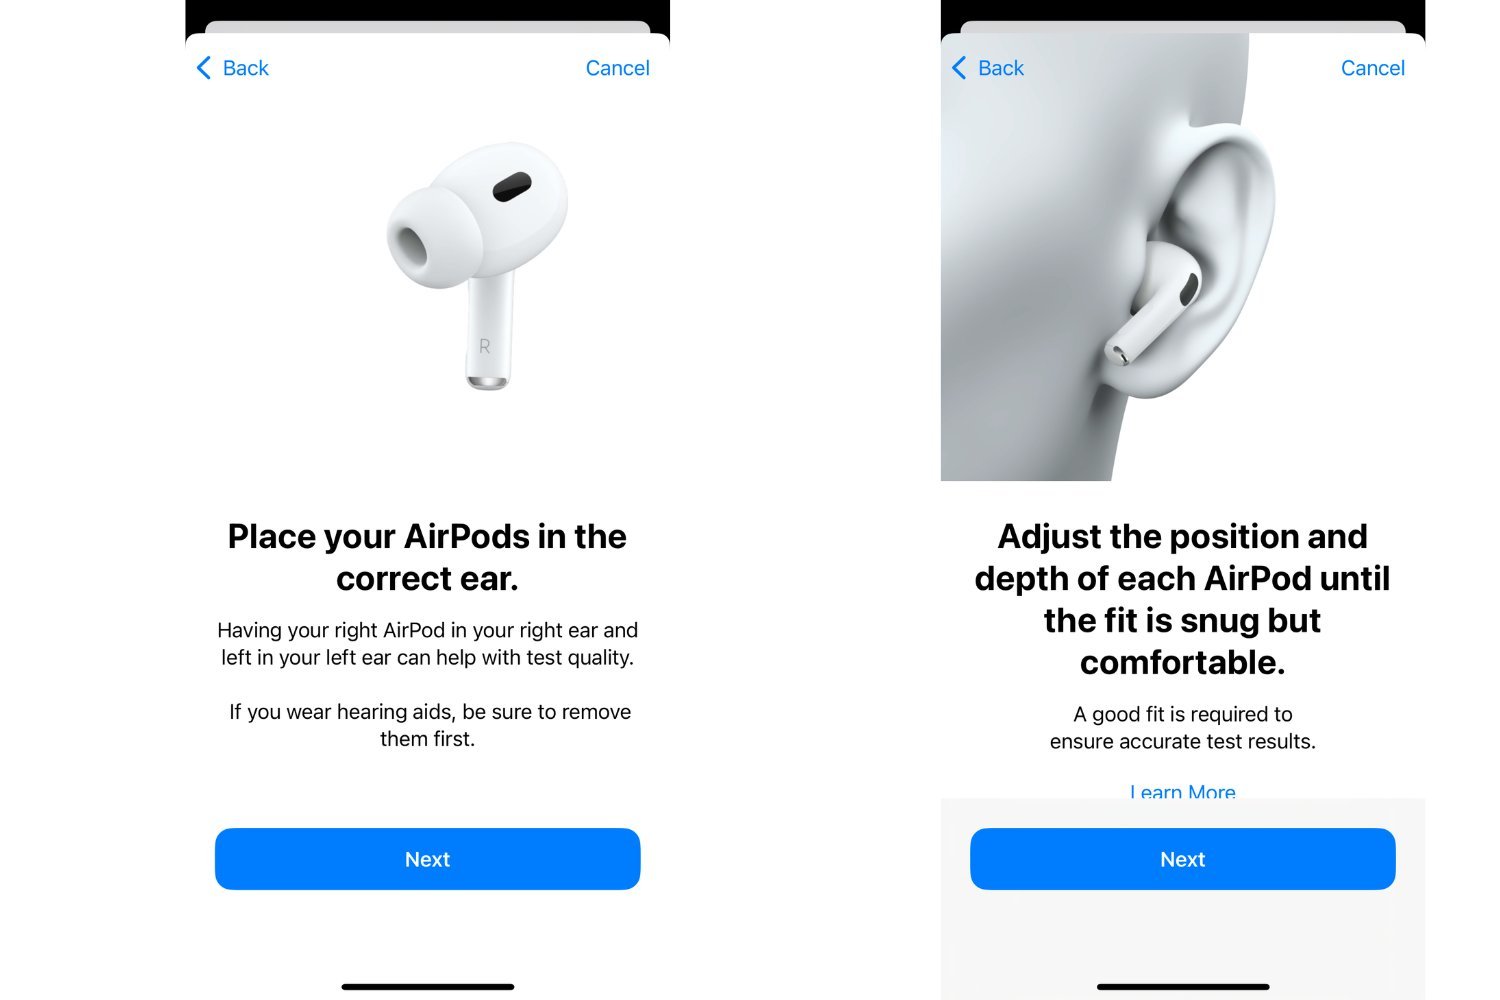
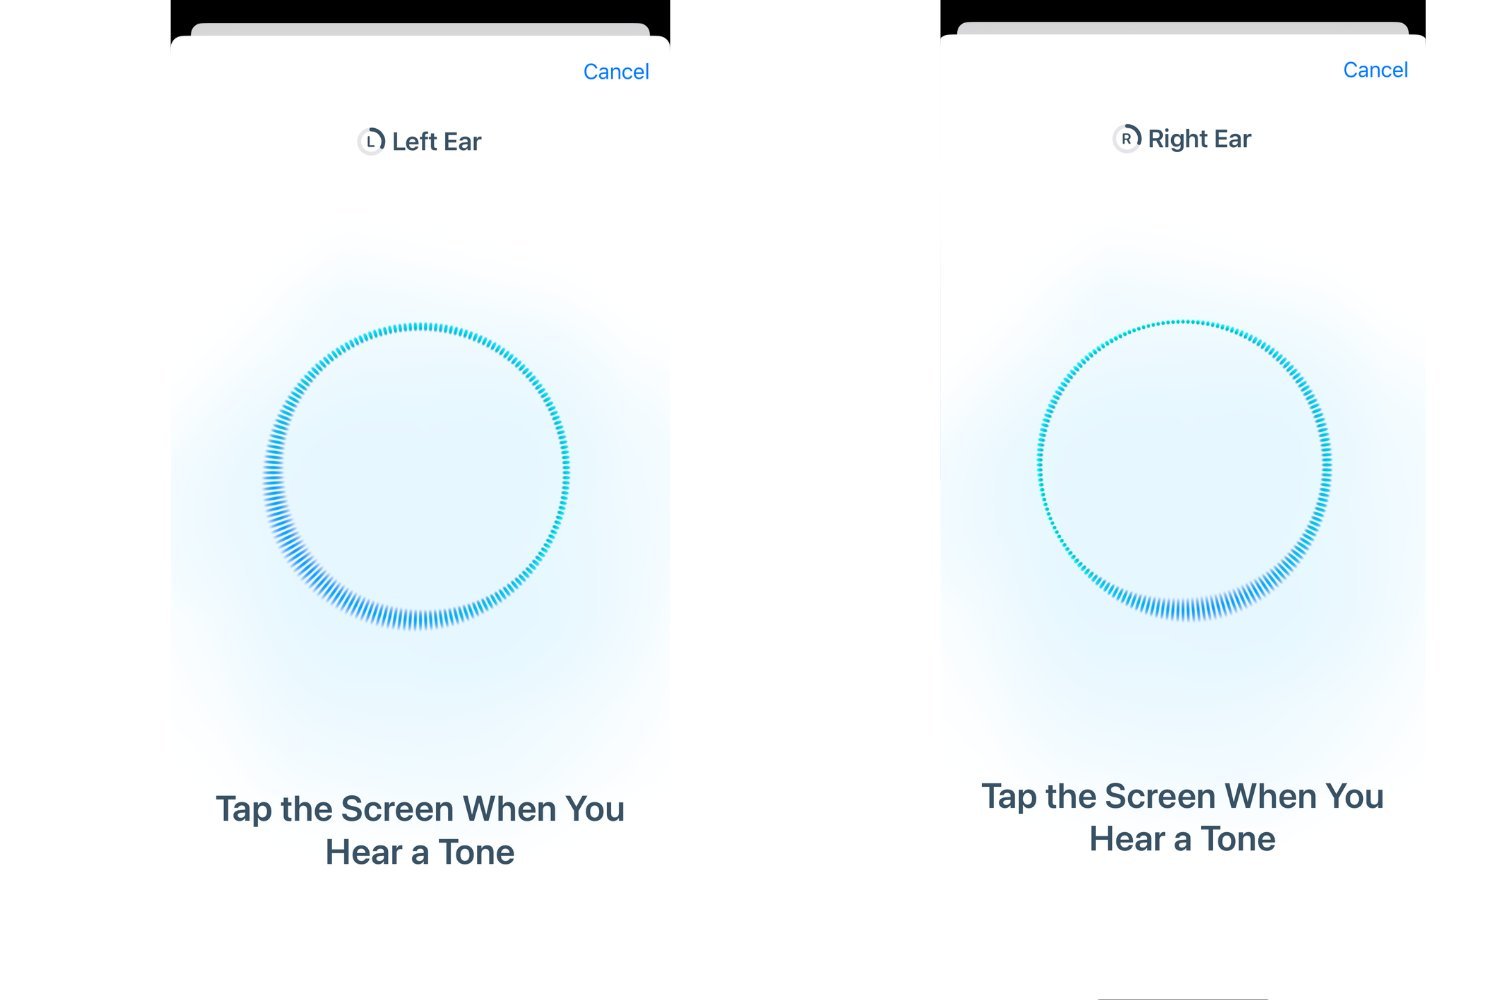
The test begins with a short and simple questionnaire and guides you through the next steps, which include checking your AirPods fit to see if they’re snug enough. When the test starts, you must tap the screen whenever you hear a sound. It’ll test both your ears individually and inform you when the test is complete.
How to Read the Results
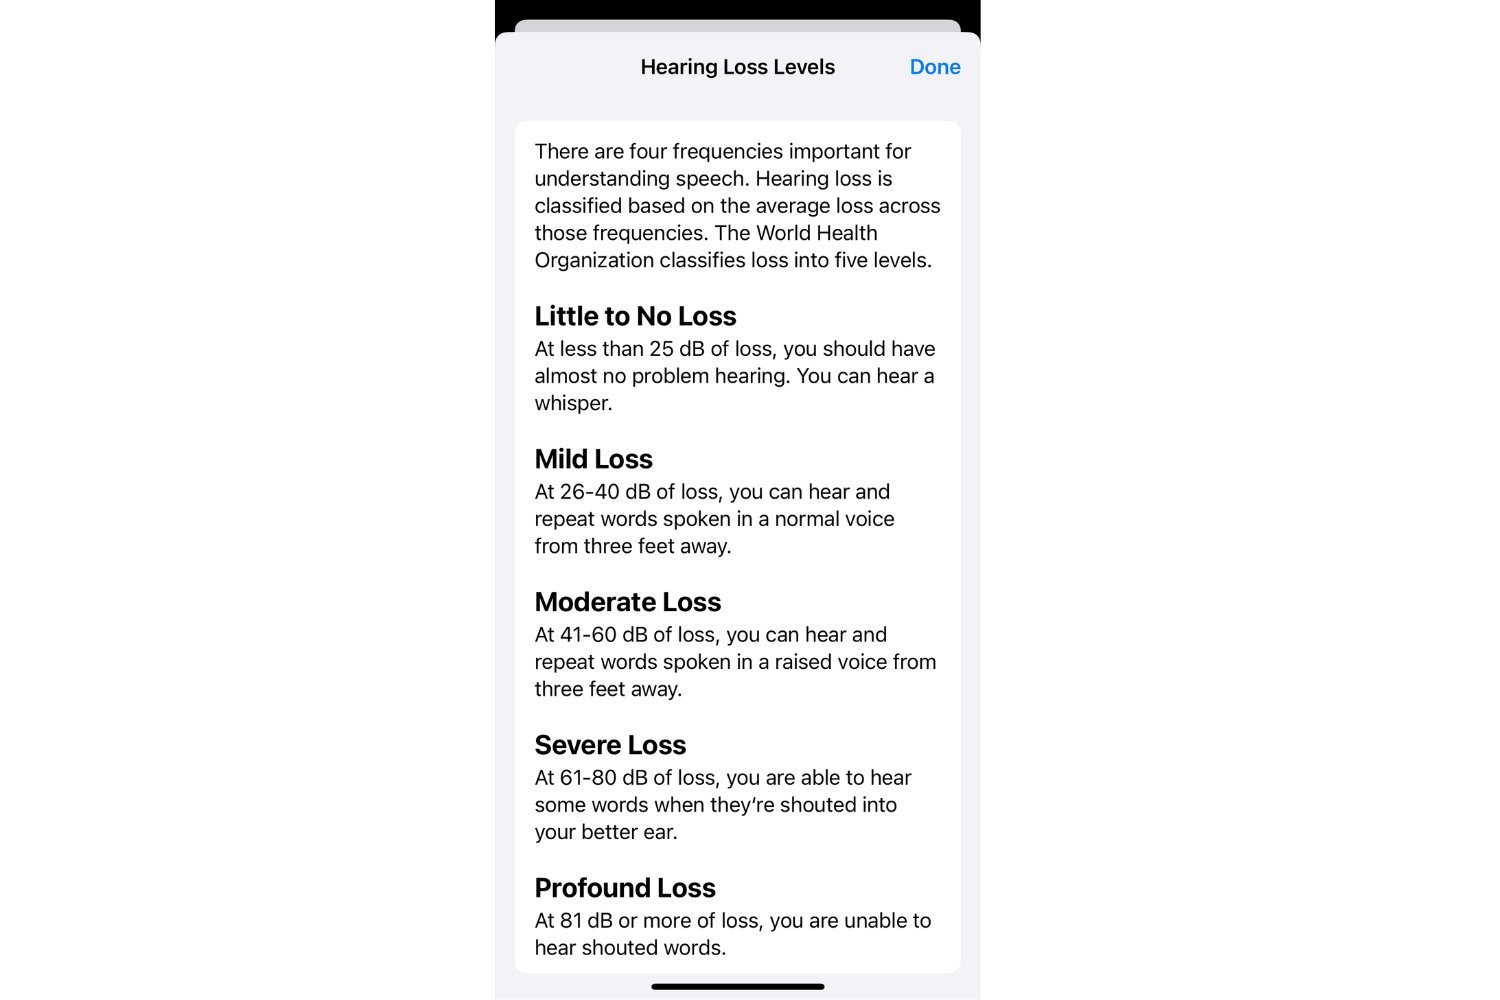
The results are displayed as a graph and respective dBHL (decibels hearing level) for each ear, along with a short comment for folks who don’t know what to do with those figures. I got “Little to No Loss” for both ears (thankfully), along with a 6dBHL for my left ear and 5dBHL for the right. You can tap on “Show Details” to learn how the dBHLS works.
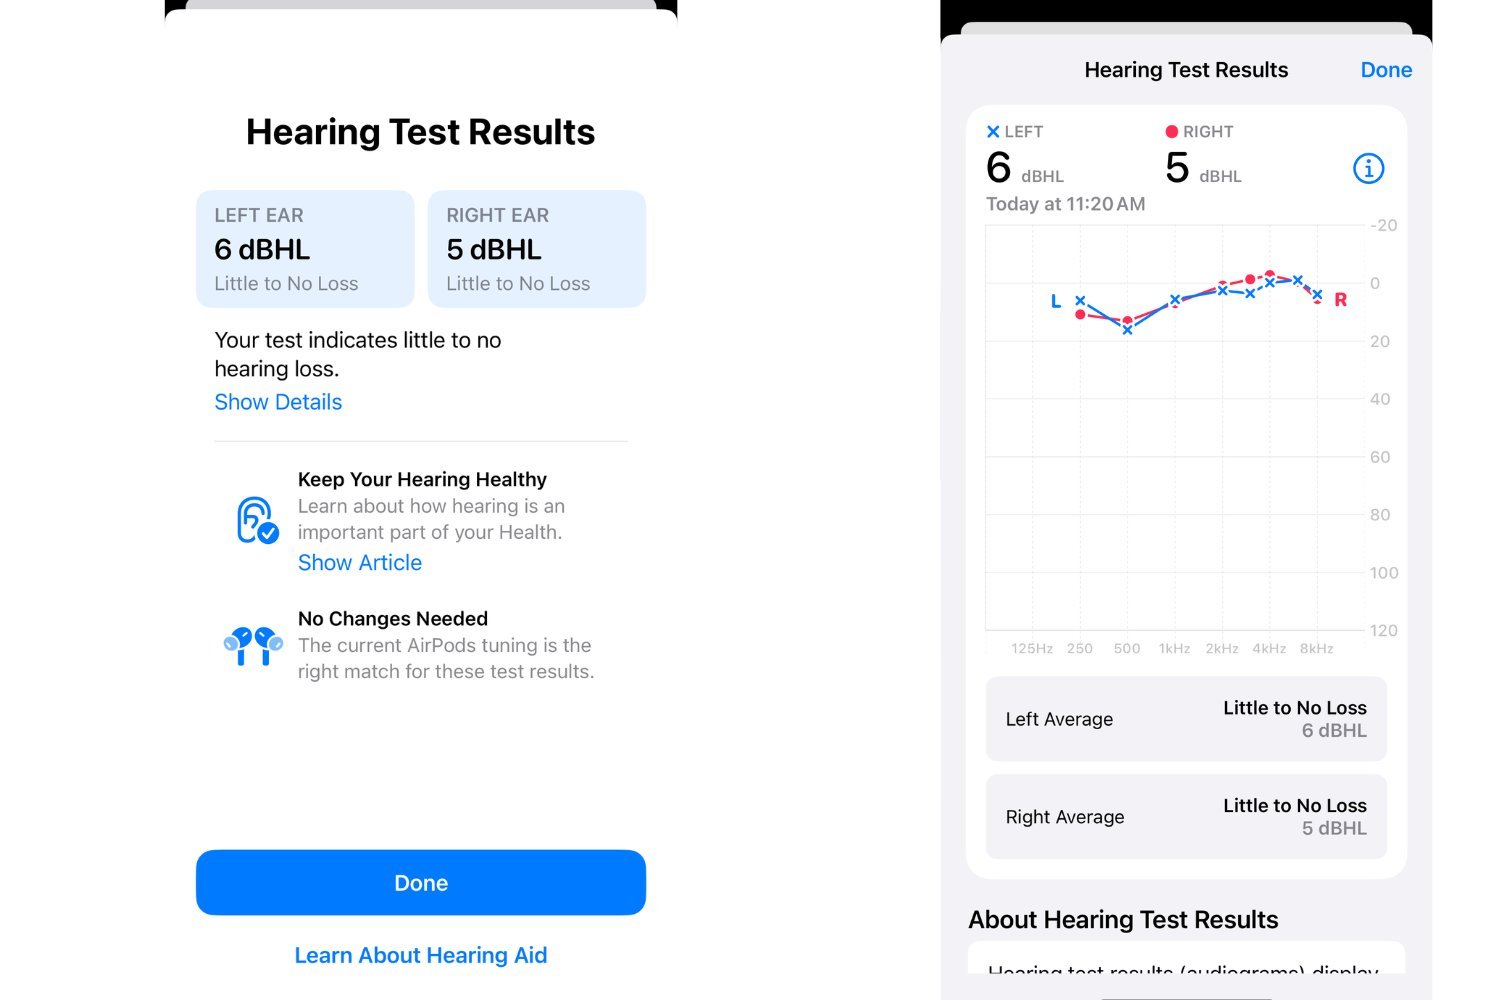
If your hearing turns out fine, the result page will tell you “No Changes Needed.” If it indicates mild to severe hearing loss, it will enable you to use the hearing aid features. You can also go into Settings > AirPods Pro > Hearing Assistance to enable the hearing aid and media assist features. The former will double your AirPods as hearing aids to boost voices and sounds around you, while media assist will make adjustments to improve the clarity of music, videos, and calls.
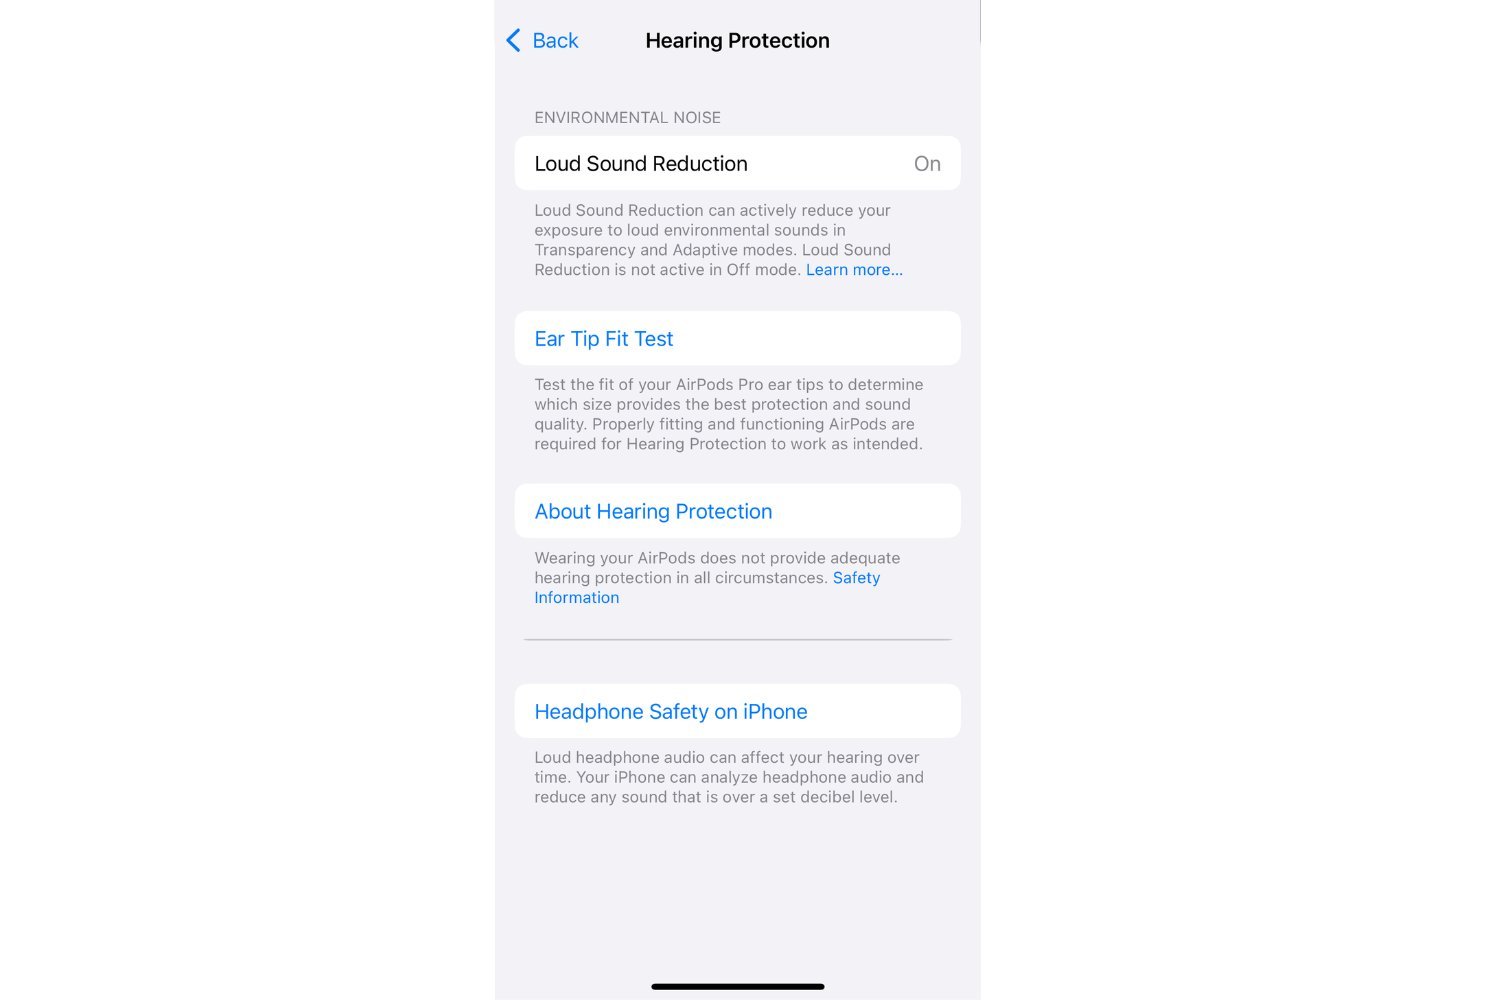
The third hearing health feature, Hearing Protection, will automatically be enabled as part of the update, but you can double-check that at Settings > AirPods Pro > Hearing Protection > Loud Sound Reduction.
You can take a new test whenever you want, and your iPhone will automatically use that data to check if it needs to enable the hearing assistance features for you.
Read the full article here

